Materials for this projects were found here.
The components required for this project were:
- Two arduino chips, personally I used an Elegoo Mega 2560 and an Arduino Uno.
- A 433MHz RF Transmitter and Receiver module set. This was sourced from here for £4.36.
- Breadboard jumper wires used to connect components to the modules.
The ArduinoIDE was used to handle the software requirement throughout this project. The RadioHead library was required for both the transmitter and receiver sketches so was added to the IDE library.
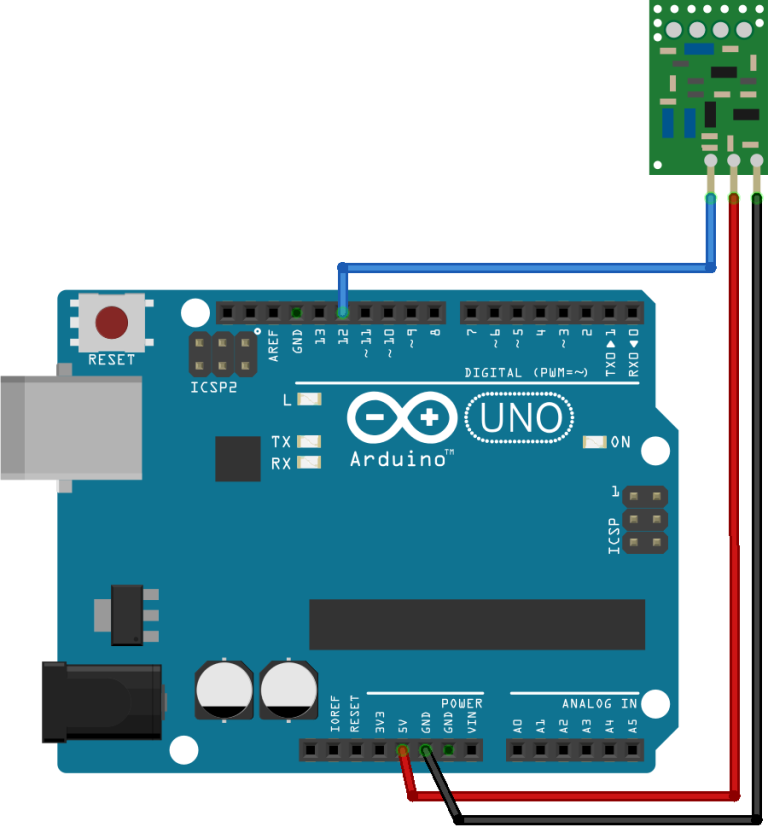
The transmitter circuit was configured as follows:
The transmitter sketch was written as:
#include <RH_ASK.h>
#include <SPI.h> // Not actually used but needed to compile

RH_ASK driver;

void setup()
{
    Serial.begin(9600);	  // Debugging only
    if (!driver.init())
         Serial.println("init failed");
}

void loop()
{
    const char *msg = "Hello World!";
    driver.send((uint8_t *)msg, strlen(msg));
    driver.waitPacketSent();
    delay(1000);
}
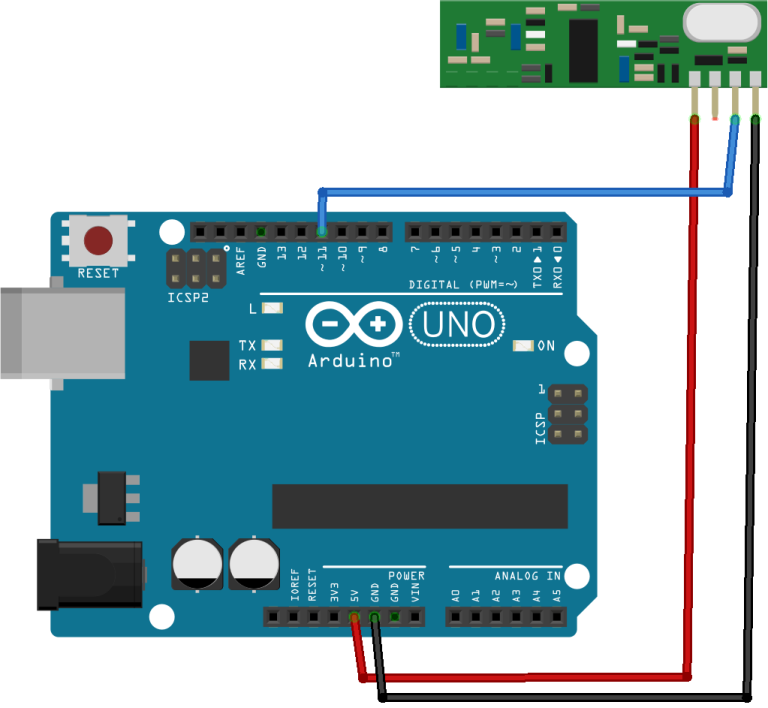
The receiver circuit was configured as follows:
The receiver sketch was written as:
#include <RH_ASK.h>
#include <SPI.h>

RH_ASK driver;

void setup()
{
    Serial.begin(9600);
    if (!driver.init())
         Serial.println("init failed");
}

void loop()
{
    uint8_t buf[12];
    uint8_t buflen = sizeof(buf);
    if (driver.recv(buf, &buflen)) // Non-blocking
    {
      int i;
      // Message with a good checksum received, dump it.
      Serial.print("Message: ");
      Serial.println((char*)buf);
    }
}
Once built, this setup was able to transmit and receiver FM data over short distances. The message that was transmitted could be modified within the transmitter sketch.